Making a functional 10-key keyboard
Software, firmware, and hardware for a practically useless keyboard
No, that doesn't mean 10 keys with layout layers or letter combos. It means 10 keys, typing just as you would on a standard layout— but without moving your fingers.
This is the capstone project for my 12th grade electrical engineering class. Still a work in progress!
Software
So... how do you make a (usable) keyboard with just 10 keys? There are three steps:
- Map fingers to letters — Convert key presses into possible letters
- Map letters to words — Convert letter combos into real words
- Map words to a sentence — Combine those words into a coherent sentence
Let's start with step 1.
Finger mapping
Let's assume you type on a standard QWERTY keyboard using all 10 fingers.
Let's color every key based on which finger you use to type it. I type a little wonky, so keys like q and z are technically assigned to the wrong finger. Note that some keys aren't colored and others are omitted completely, like the number keys. We'll discuss that later.
Because we know which finger types which set of keys, we can work backwards. Given a set of key presses, let's figure out which letters the user could be trying to type.
We have our letters! Let's move on to step 2.
Dictionary lookups
We now know every letter that each key press might correspond to. If we wanted to, we could try every possible letter combination in a sentence to find the best match. Sadly, even with the example sequence of 5 key presses, that would be 7*2*3*3*3 or 378 combinations to look through. That number easily blows up with longer sequences, so let's make it a bit easier for our computer.
We can narrow down the number of combinations by using a dictionary. I use a trie on a list of around 100,000 English words to quickly check if a letter combination is a valid word. Using this, we can discard any letter combinations that aren't real words.
Try placing your hands on the number row of the keyboard to test different sequences.
Voila! We've gone from 378 combinations to just 2: "hello" or "jello". But how do we know which one the user meant?
AI voodoo
That's right, it's time for AI slop. But first, let's break down what we need to do more clearly. We have multiple sequences chained together to form a sentence. Each of these sequences can be one of multiple words, and we need to figure out which word would make most sense in the context of the sentence.
Let's start with the naive approach:
- Have the AI model spit out a first word
- With each subsequent word, pass in the beginning of the sentence for context
- Repeat until there are no more words left in the sentence
This is a pretty good start, but how do we make sure each word the model outputs belongs to the set of possible words at its location?
Well, the nice thing about using text-completion models is that they optimize this exact task- figuring out which word is most likely to come next in a sentence. In fact, they're even kind enough to tell us the exact probability of each following word. So, at each sequence in the sentence, all we have to do is look up how highly the model scores each possible word. The word with the highest score is the one we want.
Here's a general idea of how this works:
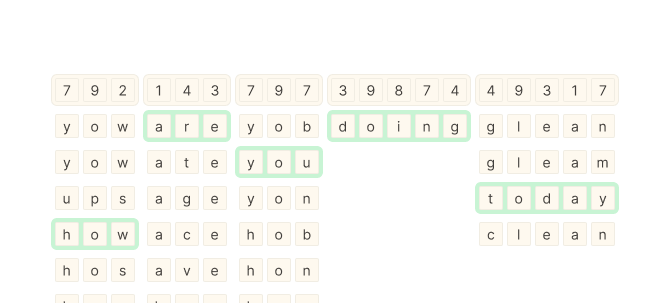
I ended up using GPT-2 for this, but any text-completion model should work. Our keyboard is now functional!
Infilling
...Well, technically. But we can do a lot better! Take the same example:
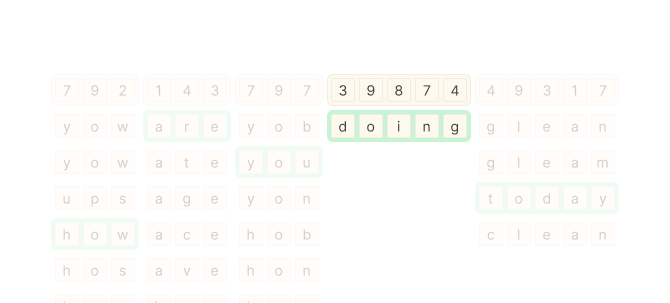
Notice that the key sequence 39874 only corresponds with the word doing. We therefore know with certainty that the word at that location must be doing, but our naive model doesn't know that, so it blunders along sequentially anyway.
To fix this, we can take a different approach. Instead of passing in the beginning of the sentence for context, we can pass in the entire sentence with the known words already filled in. This way the model can see the entire context of the sentence and make a more informed decision.
For these infilling tasks, I ended up using BERT. The dynamic duo of GPT-2 and BERT makes the keyboard a lot more accurate (purely observational; benchmarks coming soon). Check out the completed server code here.
And with that, we're finally done with the software!
Firmware
Onto the easier bit. All we need the firmware to do is tell the computer which keys are pressed so the computer can figure out what words to type. Since we only have 10 keys, we can avoid typical key matrix wiring altogether and wire buttons straight to their own pins on the microcontroller. Here's the circuit diagram for reference:
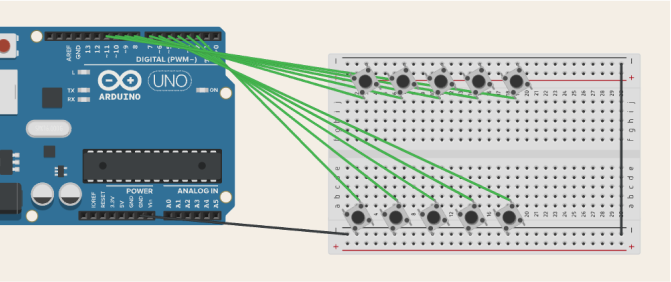
Note that the buttons are wired straight to ground, making use of the Arduino's internal pull-up resistor. When the button is pressed, the pin will read LOW.
This has the sweet benefit of making the firmware super simple. In the c++ code, we keep track of all of the pin states...
const int buttonPins[] = {2, 3, 4, 5, 6, 7, 8, 9, 10, 11}; // assigned pin for each button
int buttonStates[] = {HIGH, HIGH, HIGH, HIGH, HIGH, HIGH, HIGH, HIGH, HIGH, HIGH}; // initial state of each button
...check if the pin states have changed...
void loop() {
  int index = 0;

  for (const int &pin : buttonPins ) {
    int newButtonState = digitalRead(pin);
    int currentButtonState = buttonStates[index];

    if (newButtonState != currentButtonState) {
      // pin state changed!
    }

    index++;
  }
}
...and if they have, we send the new states to the computer.
// ...
if (newButtonState != currentButtonState) {
  buttonStates[index] = newButtonState;

  if (newButtonState == HIGH) {
    Serial.println(String(index + 1) + "r"); // key released!
  } else {
    Serial.println(String(index + 1) + "p"); // key pressed!
  }
}
// ...
We do run into some noisy data from key bouncing, but we can fix it by applying some debouncing logic. Check out the completed firmware code here. It has has a few extra features, but the core logic is the same.
And that's it! The firmware is done.
Hardware
Time to put it all together! Here's what we settled on for the parts:
The mechanical team worked on the case while we worked on the electronics. Here's the 10-key keyboard on its maiden breadboard voyage:
Beautiful.
Sadly, the ship never got any prettier. We got lost in soldering hell, so the best we could do was the breadboard prototype. Here's some makeup on the pig:
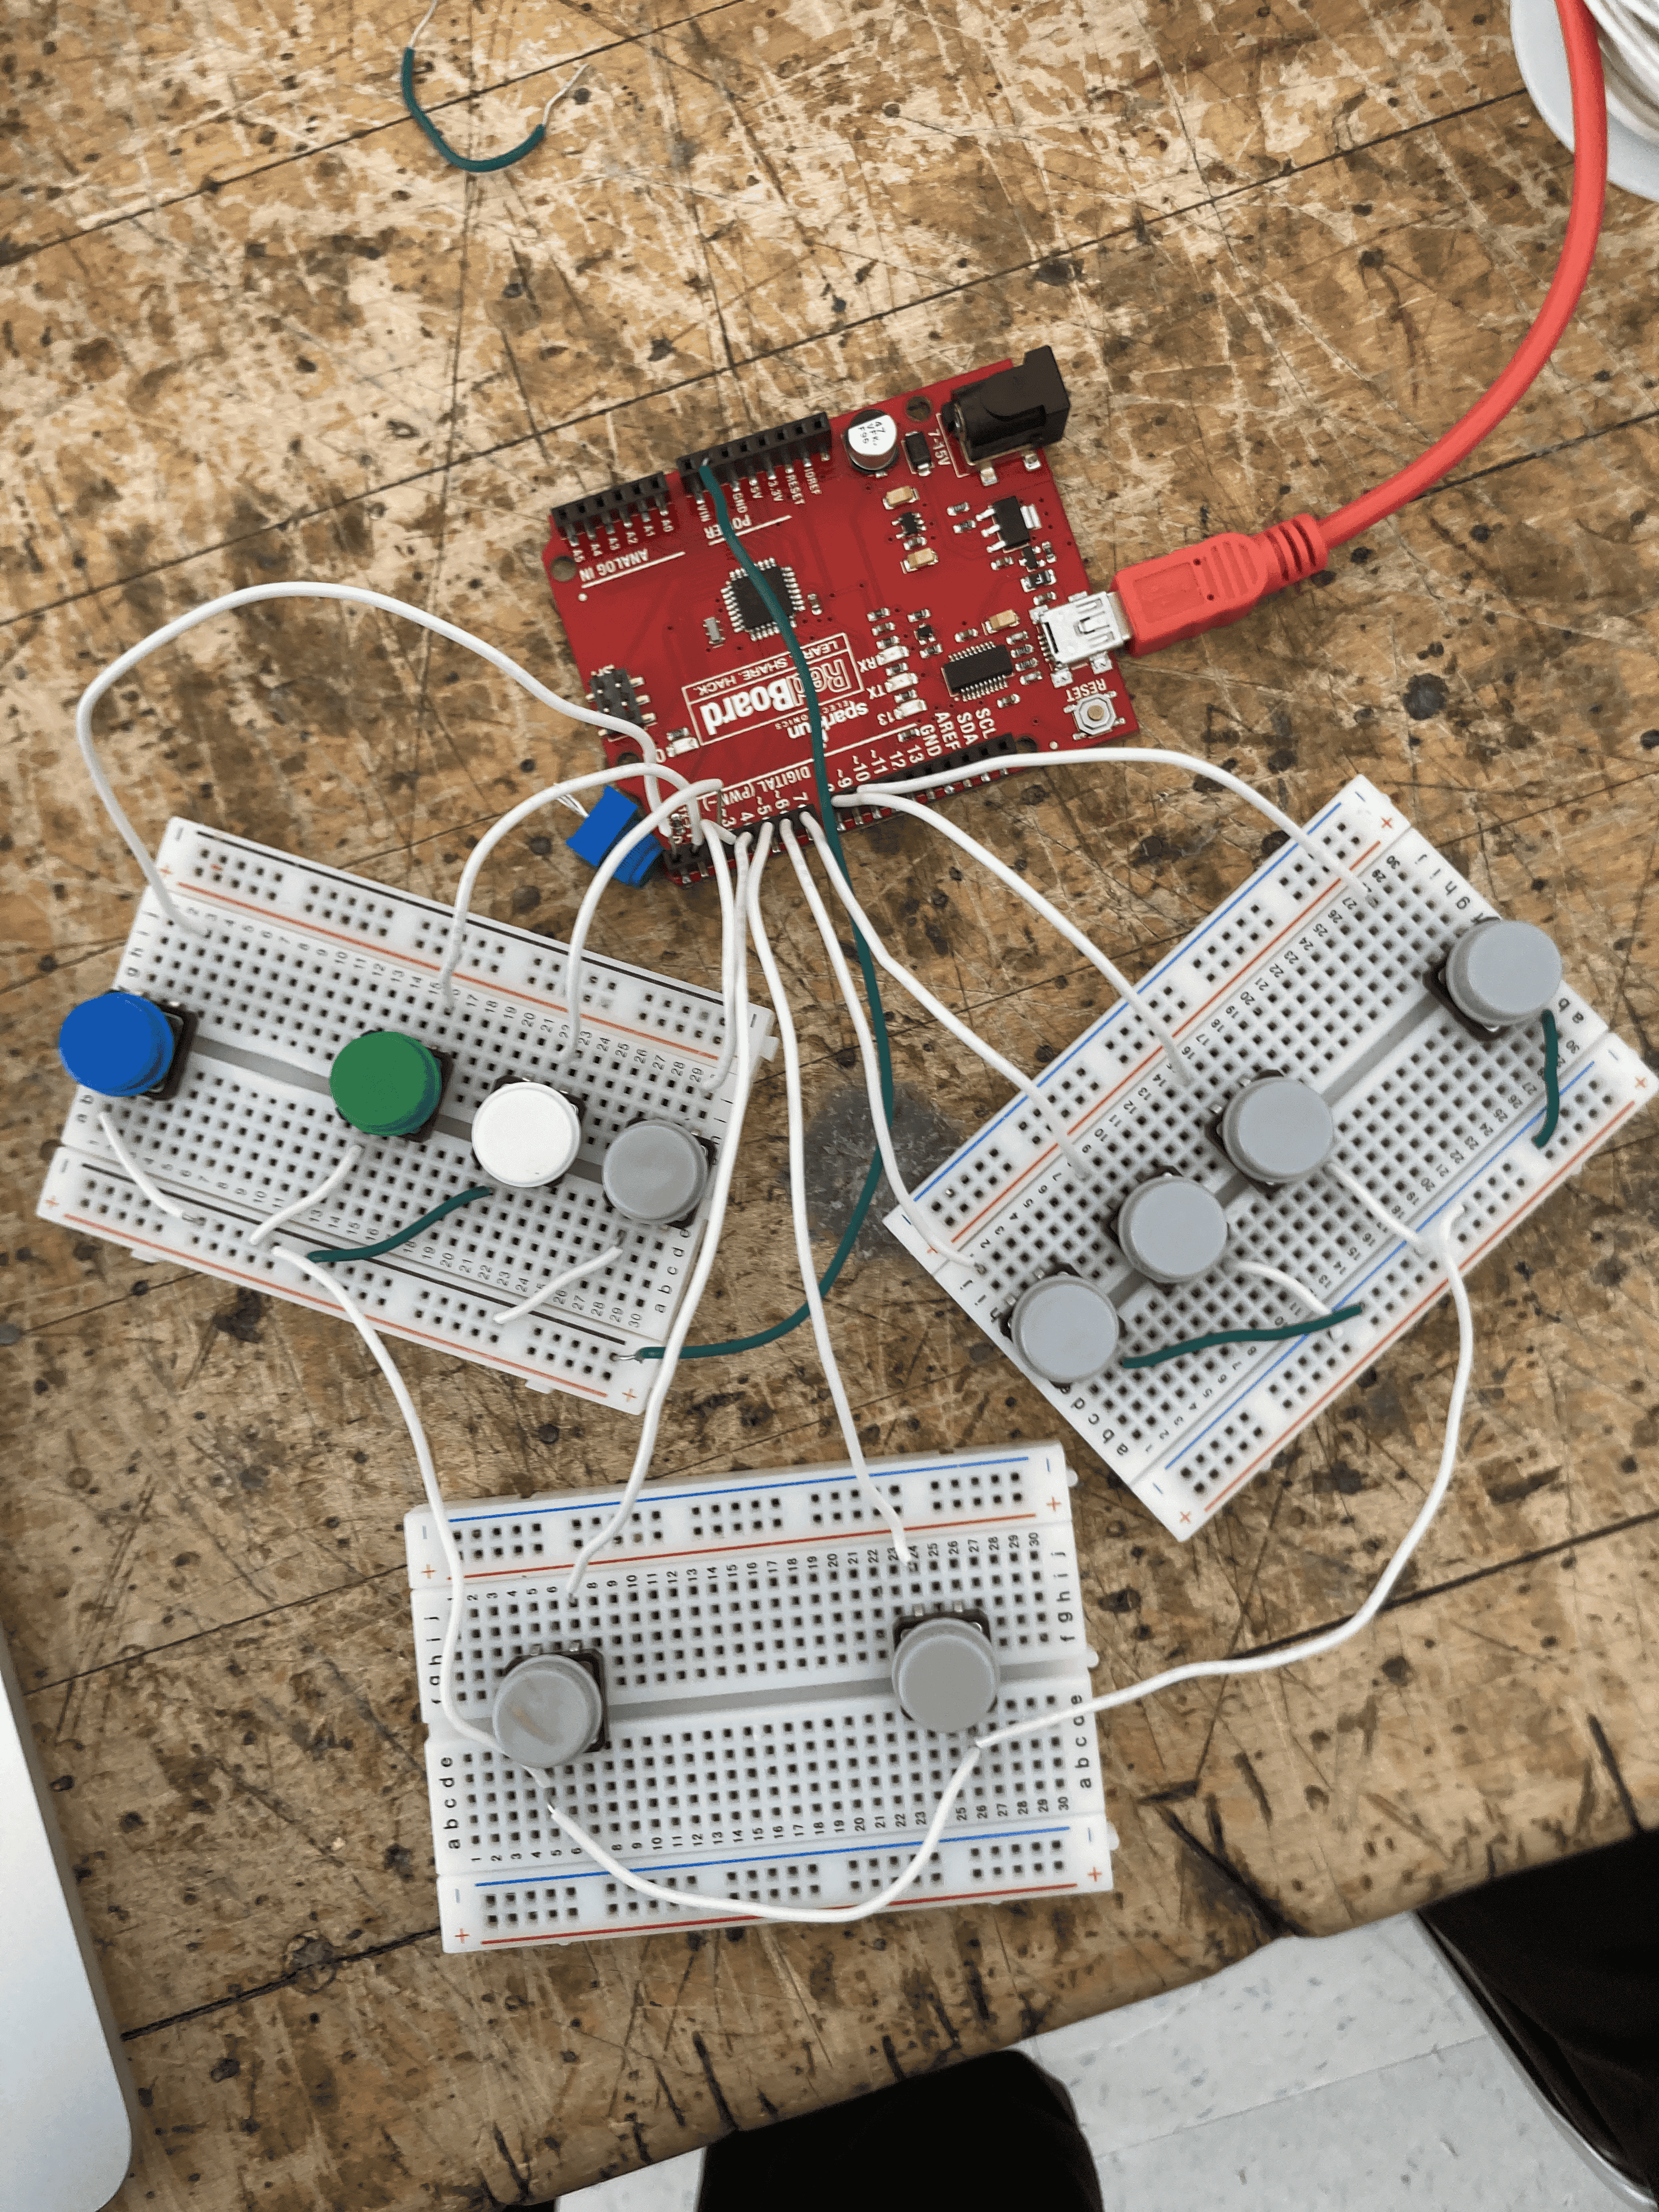
Next steps
The keyboard works, but there's still plenty of work to be done. Here are some things I plan to work on:
- A GUI to visualize keys as they are pressed
- An editor to add custom words to the dictionary
- A 3D-printed case
- Shortcuts for punctuation and special characters
- A better name
...etc. I'm really enjoying this project so far and I can't wait to see where it goes!